July 28th, 2008 by katie

Quick skillet meals and salads are dinner staples during the summer-when the sweltering temperatures mean no one is interested in a hot, heavy meal or heating the kitchen for hours. This delicious take-out inspired meal combines the best of both. As written this is a perfect light summer meal for two or appetizer for four. I need to double this when I make it for dinner for my family-two adults and two kids. For four hungry adults, or as a party appetizer, I would triple it.
Chicken Lettuce Wraps
serves 2, prep 10 min, cook time 10 min, adapted from Recipezaar
- 2-3 tbsp oil, sesame or peanut are nice
- 1 lb ground chicken
- 4 oz mushrooms
- 1/2 cup water chestnuts (optional)
- 1/2 yellow onion
- 2 cloves garlic
- 2 tbsp soy sauce
- 2 tbsp rice wine vinegar
- 2 tbsp brown sugar, I use dark
- iceberg lettuce leaves
- Heat the oil in a skillet or wok over high heat.
- Break up and brown the ground chicken. Remove cooked chicken from the pan, reserving the oil. Do not rinse the pan.
- Mince all of the vegetables-mushrooms through garlic. You also might want to run your knife through your cooked chicken as well to get the pieces more uniformly sized, you want everything to be texturally at the same fine mince.
- In a small bowl whisk together the soy sauce, sugar, and vinegar. You could also add some red pepper flakes or sriracha sauce
 if you want a little spice.
- Reheat your oiled pan to high heat, adding some additional oil if necessary.
- Add your chicken and vegetables to the hot oil and saute until onions and garlic soften.
- Add the sauce and cook and toss for an additional couple minutes. Taste and adjust your salt and seasonings.
- I serve this family style, in a large bowl, with plenty of iceberg leaf “cups,” fried rice and steamed sugar snap peas.
Don’t let the brown sugar in the sauce bother you, it does not make the dish overly sweet. Mr. Chaos does not particularly care for sweet entrees so I am generally on the look out for sugar as an ingredient. However, I have found in many stir fry sauces sugar and honey simply add depth of flavor that balances out the salty and vinegary. We love anything you eat with chopsticks so I’ve had to run this risk with numerous recipes and we’ve always agreed it balances well without being overly sweet.
Does anybody have any suggestions as to how to easily separate a head of lettuce? There’s got to be a way since restaurants do it all the time. My lettuce cups were particularly pitiful this go round.
Posted in Easy, Fast, Main Dish, Snacks/Appetizers having 8 comments »
July 26th, 2008 by katie
I am not sure what it is about onions that turns people off. Frankly, I love onions. Yet, I have found many people-especially husbands-who can’t stand onions in their food. At the knife skills class we took recently it was the general consensus among the men that they did not want chopped onions in their food. The agreed upon solution amongst the women? Continue adding onions, but at a smaller dice so they couldn’t be easily picked out. A bit passive aggressive, no?
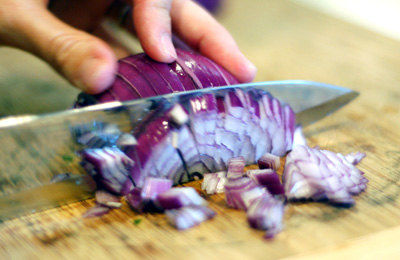
Cutting an onion has long been a knife skills nightmare. First you spend forever peeling it, then it falls all apart while you are trying to chop it, and you can’t even see what you’re doing through the burning, stinging tears so the end result is a haphazard mish-mash of onion pieces and probably a little blood. But, like most things, there’s a trick to dicing an onion. Once you see it, you’ll be a master of the finely diced onion.
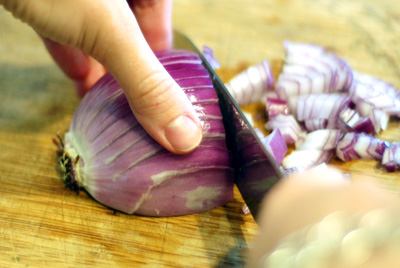
Save yourself the trouble of peeling the onion from the onset. First, cut off the top of the onion-not the root side, very important! Removing the end of the onion first allows the papery peel to come off much easier. It also allows you to see where to separate the paper and first layer of onion and to get a better grip on it.
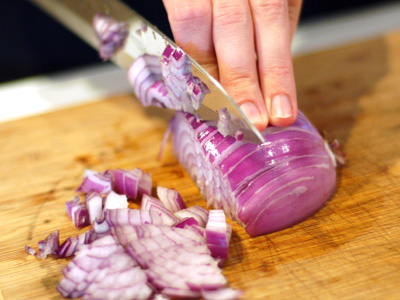
Next, slice your onion in half from the top through the root to give you a flat surface to rest the onion on. At no point do we cut the root end off the onion. The root is what is going to hold all of your onion layers together while you are chopping. Begin making vertical slices all the way through the onion but not extending past the root (see picture above). The thickness of these slices will determine how fine of a dice your onion comes out to, so as you practice try making the slices thinner and thinner.
Once your vertical slices are in place begin slicing your onion across it’s width, as though you wanted onion rings. Thanks to your root, you won’t have to try to grip all of the pieces together while you are slicing. Watch as your vertical slices make your onions “rings” fall into a perfect dice! Remember the key to dicing is planks, then squares. Onions are great in that the planks are built in. Of course, if you really have to you could go back over your onion pieces and mince them even finer. Beyond that, you’ll just have to breakout the grater or food processor.
Stay tuned for tips on how to keep the tears at bay!
Follow along the Knife Skillz Series.
Posted in Tips and Tricks having 3 comments »
July 24th, 2008 by katie
Never fear! I will be posting a “real” cake recipe in a few weeks. But for now, with the lazy, hot days of summer fully upon us, this easy staple of church bazaars and potlucks will suffice.
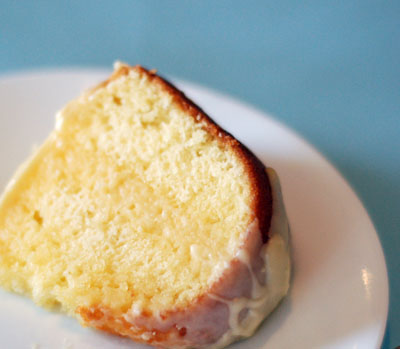
Lemon Jello Cake
makes 1 cake, prep 10 min, cook 30-50 min
- 1 box yellow or white cake mix
- 1 box (3 oz.) lemon jello
- water, oil, eggs as directed in cake mix instructions
- 2 tbsp lemon extract
- 2 cups powdered sugar
- 2 tsp flavor extract (vanilla, lemon, almond, etc..)
- 1/4 cup water
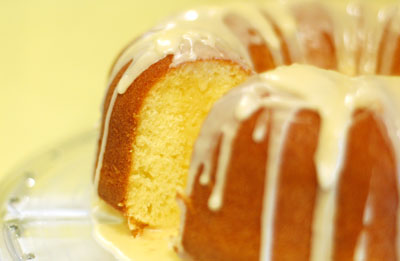
- Preheat oven and prepare pan according to cake mix instructions. Personally, this cake screams BUNDT!
- In a large bowl, add the jello mix to the dry cake mix.
- Add wet ingredients as directed in cake mix instructions adding 2 tbsp lemon extract as well.
- Prepare batter, pour into pan and bake all as directed in cake mix instructions.
- Because I made a Bundt cake I also made a glaze for it by combining powdered sugar, water, and vanilla.
- Combine the glaze ingredients then let it sit for a few minutes to thicken up and smooth out. Add the water little by little, stopping once you have the consistency you want. I also added about 3 drops of yellow food coloring because my vanilla extract turned my glaze brown.
- Once your cake has cooled, begin spooning the glaze along the top of the Bundt cake allowing it to naturally drip and run down the sides.
A few notes. Notice if you subbed the word “strawberry” for the word “lemon” in the above recipe you’d get a strawberry jello cake, or any other jello flavor you’d enjoy in cake form. Also, I picked a vanilla glaze thinking it would balance out the lemoniness of the cake, but I think I would prefer a lemon glaze next time for even more lemon flavor. Jello cake has a moist sweetness with a subtle lemony flavor so I think an extra lemony punch from the glaze would be nice.
This is a great recipe to make with kids considering it mostly consists of dumping ingredients into a bowl. My three year old would have probably done most of this by herself if she had been home when I made it. As it was, my six year old sifted the powdered sugar (not a necessary step, I just thought she’d enjoy it) and helped spoon the glaze over the cake. I would have had her make the cake too but she couldn’t pry herself away from Cinderella 3 long enough to be of any help.
Posted in Cooking with Kids, Desserts, Easy having 7 comments »
July 22nd, 2008 by katie
Tired of watery sour cream? Ice crystals on your ice cream? Well the answer to these and many other kitchen problems is a plastic wrap strategy session. Prepare to be amazed.
Mr. Chaos can happily sit down and polish off a pint of ice cream. I, on the other hand, like to enjoy the cold stuff a little less frequently. But when I do, its for real. I need it and I need it now. So when I pop the top off of my pint of banana split Haagen Dazs after weeks of hibernation and it’s covered in ice crystals, I am more than a little disappointed. Likewise, with homemade ice cream a little goes a long way. I hate putting in all that work just to have it ruined after a few weeks. The solution? Smooth out the ice cream and press a sheet of plastic wrap against the surface and up the sides of the container. Then put the lid on and viola! Ice crystal free ice cream for weeks, even months.
The “trick” is you are pressing out all of the air and making the food as air-tight as possible. It actually works in several situations, like keeping guacamole green (at least for a couple days) and keeping other frozen foods ice crystal free as well. It also prevents custards and puddings from developing the “skin” on top during the cooling/setting stage.
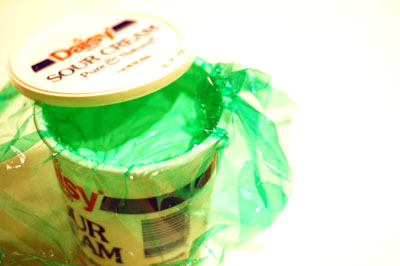
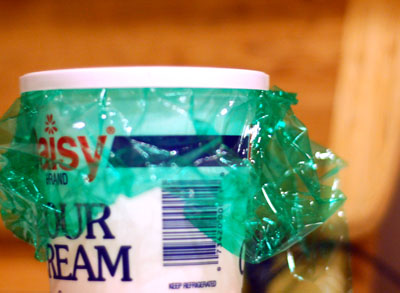
My most common use for plastic wrap: I can’t stand that goopy water that develops on top of sour cream and yogurt, and when I try to pour it off I inevitably can’t get it all or pour half my sour cream down the drain as well. To prevent the separation all together, do the same as for ice cream: smooth the top and press your plastic wrap against the surface and up the sides before putting the lid back on. When you’re ready to use it just lift the plastic wrap back and you’ll have thick, creamy sour cream and yogurt with no liquid separation.
Posted in Tips and Tricks having 2 comments »